A Simple Todo List Using Flask and RethinkDB
Today they will be creating a simple todo list, which you’ll be able to modify to meet your own needs. Before beginning, I highly suggest reading over this article, which details how RethinkDB differs from some of the other NoSQL databases.
Set up RethinkDB
Install
Navigate here and download the appropriate package for your system. I used Homebrew –
$ brew install rethinkdb – and it took almost twenty minutes to download and install the build:Install the Python drivers globally:
Note: I installed Rethink globally (outside of a virtualenv) since I’ll probably use the same version with a number of projects, with a number of different languages. We will be installing in within a virtualenv later on in this tutorial.
Test
First, let’s start the server with the following command:
If all is installed correctly, you should see something similar to:
Then test the connection. Open a new window in your terminal and enter the following commands:
You should see:
Exit the Python shell but leave the RethinkDB server running in the other terminal window.
Set up a Basic Flask project
Create a directory to store your project:
Set up and activate a virtualenv:
Install Flask and Flask-WTF:
Create a requirements:
Download the Flask boilerplate
Found in the template directory of this repo.
Your project structure should now look like this:
Run the app:
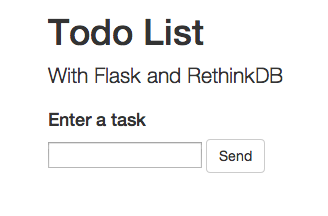
Navigate to http://localhost:5000/, and you should see:
Don’t try to submit anything yet, because we need to get a database setup first. Let’s get RethinkDB going.
RethinkDB Config
Install RethinkDB:
Add the following code to “views.py”:
Check the comments for a brief explanation of what each of the functions do.
Start your server again.
You should see the following alert in your terminal:
If you see this errorrethinkdb.errors.RqlDriverError: Could not connect to localhost:28015.your RethinkDB server is not running. Open up a new terminal window and run$ rethinkdb.
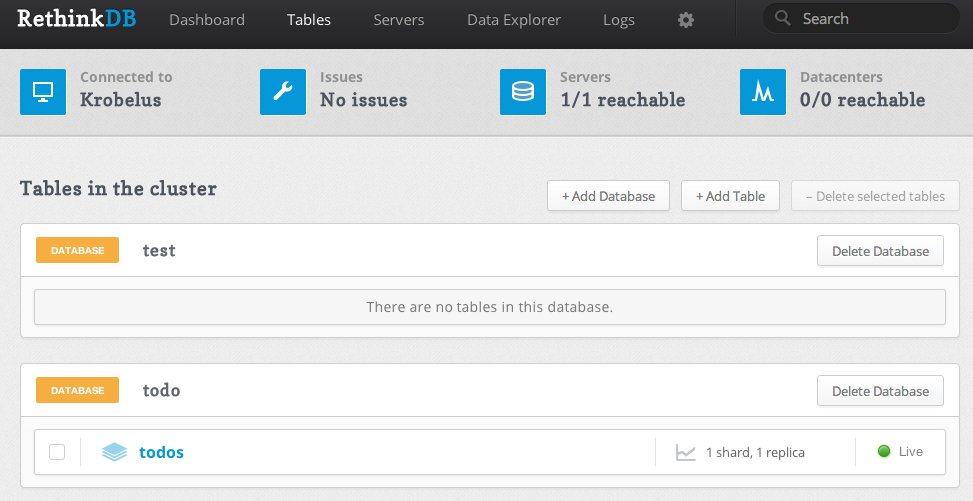
So, we created a new database called “todo”, which has a table called “todos”.
You can verify this in the RethinkDB Admin. Navigate to http://localhost:8080/. The admin should load. If you click “Tables”, you should see the database and table we created:
Display Todos
With the database setup, let’s add code to display todos. Update the
index() function in “views.py”:
Here we’re selecting the “todos” table, pulling all of the data, which is in JSON, and passing the entire table to the template.
Add data manually
Before we can view any todos, we need to add some first. Let’s go through the shell and add them in manually.
So, we connected to the database, then entered three new objects into the table within the database. Check the API docs for more information.
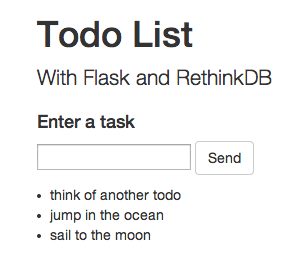
Fire up the server. You should now see the three tasks:
Finalize the form
Update the
index() function again to pull the data from the form and add it to the database:
Test this out. Add some todos. Go crazy.
Challenges
The current app is functional, but there’s a lot more we can do. Take this app to the next level.
Here’s a few ideas:
- Add a user login.
- Create a more robust form, where you can add a due date for each todo, and then sort the todos by that date before rendering them to the DOM.
- Add functional and unit tests.
- Add the ability to create sub tasks for each task.
- Read over the API reference docs. Play around with various methods.
- Modularize the app.
- Refactor the code. Show off your new code to RethinkDB.
What else would you like to see? Interested in seeing a part 2? How do you like RethinkDB in comparison to MongoDB? Share your thoughts below.
You can grab all the code from the repo. Cheers!

Comments
Post a Comment